Showing posts with label cheese. Show all posts

Monday, July 4, 2011

Enchiladas Verdes

Enchiladas Verdes


I've never made enchiladas before and have been meaning to try them out for what seems like a lifetime. I probably have about five difference recipes saved on my computer. But recently I was looking for a new mexican option for dinner and came across this one over on all recipes. I can't help it, I'm a stickler for recipes with awesome reviews. And my husband... well, he has a thing for tomatillos.

I had some trouble finding the ingredients in my regular grocery stores (yes, I went to about three different grocery stores looking for these ingredients). But fortunately, along my travels, I noticed a Mexican grocery store which had everything I needed. And was SO CHEAP! I probably paid less than half on the produce if I would've bought them in the grocery store. As a matter of fact, the second time I made this (yes, I made this TWICE in one week!) I went back just for the tomatillos and serrano peppers and it cost me less than three bucks. The tomatillos alone would've cost me at least $4 in the grocery store. And the few tomatillos I did see in one of the stores I went to were in terrible shape, and I think they had a total of 8 tomatillos. I'm glad I put those shriveled things back because the quality and quantity of the tomatillos available at the Mexican grocery store were far better.

This recipe called for blackening the tomatillos, serrano peppers and garlic. To do this, I simply put my broiler on and set them on a foil lined baking sheet. The next step was to toss it all in a blender. Well, for some reason I thought it would be a good idea to use my food processor instead.


Don't do this. Because once I turned it on, the liquid spurt out of all sides of the food processor lid. USE A BLENDER! Unless you have a better food processor that perhaps contains liquids.


At this point, the tomatillo sauce was looking fascinating.


Once you get it blended, the color changes a little, but I think it's just the aeration that gives it the cloudy appearance.


At this stage you're gonna pour the tomatillo sauce into a small pot and heat it on the stove. You'll add water and some chicken bouillon. It sounds a little strange, but really brings the flavor out in the sauce.

I wanted to show you some of the specialty mexican ingredients that I couldn't find anywhere but at this Mexican grocery store. The recipe insisted on using the Mexican Crema, and to NOT use sour cream. My husband and I loved this stuff. It was rich and creamy. Not as sour as sour cream.


This is the Cotija cheese. I still have a ton of this cheese leftover in the fridge. It looks like parmesan cheese. And as much as I like to stay authentic with the recipes, I don't think I needed a whole pound of a grated cheese. I'd have to make a lot of enchiladas to use up this cheese before it's going to expire. But after eating this recipe twice, the only thing that's really going to keep me from making these things once a week will be the side trip to the specialty store to get the fresh tomatillos.


So I was a little skeptical about the step where it calls for flash-frying the corn tortillas. I didn't understand the importance of it. But after attempting to not fry them the second time I made this - trust me, it's crucial. Otherwise the tortillas won't be pliable and will tear before you get those things even half-rolled.

Here's a look at the enchiladas before I put them in the oven.


And here is a shot of the beauties after having baked them a little to get them warmed through (because I used a rotisserie chicken which had been refrigerated).


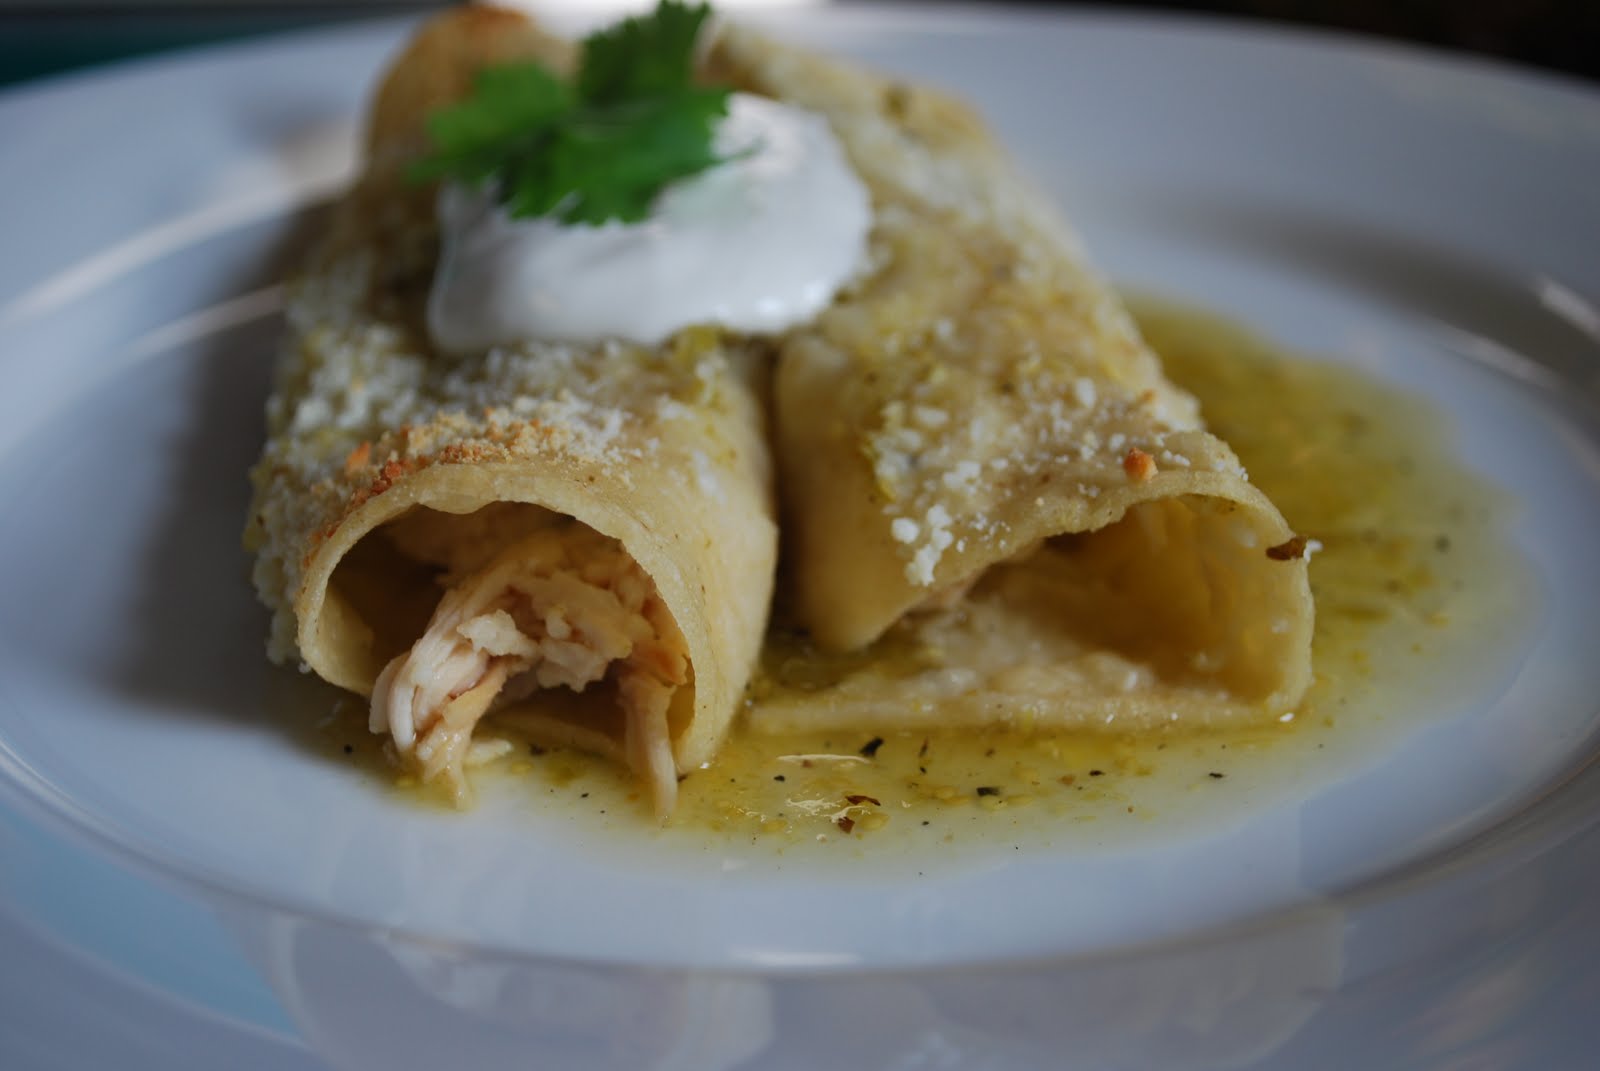
And here are a few more beauty shots:


Look at that sauce! Although it does look a little thin, and I did reduce the amount of water in the sauce the second time I made it, it was definitely not lacking in flavor.


LinkThanks to all recipes for another tried and true recipe!


BONUS TIPS:

1. The second time I made this I saved myself some time by cutting the stems off of the serrano peppers and the tomatillos before I popped them under the broiler for blackening.

2. As a time saver, when I was filling the tortillas, I realized I could mix the shredded chicken with a few spoonfuls of the tomatillo sauce and a generous sprinkling of the cotija cheese and mix it all together instead of layering them individually onto the tortillas.

3. The second time I made this I was really curious about adding shredded cheese since every enchilada I've ever had was smothered in melty cheese. So I bought a block of monterey jack cheese, shredded the whole thing, and sprinkled it all over the enchiladas before popping them into the oven for heating. Personally, I thought this really made the recipe. My husband liked them both ways. So if melty cheese is your thing, don't hesitate to go for it!

Sunday, June 27, 2010

Portobello Mushroom Lasagna Rollups


I'm on a roll this month... two dinner posts in 2 weeks. That's more than I've posted all year! Anyway, last week the hubs and I stopped in Wegman's and realized how much better their produce is than our local Shoprite and Acme stores. It was sort of an inspiration to pick a bunch of new recipes and head to Wegman's for the ingredients. One of the recipes I chose was from one of my favorite Food Network chefs, Ellie Krieger. I got a couple of her cookbooks, of which 3 of this week's dinner recipes are coming from. Tonight's dinner was from The Food You Crave. If you don't have her cookbooks, I highly recommend hers. Her recipes are always so balanced in nutrition and flavor. Granted, I always add a bit more salt to my recipes, but I'd rather it taste good than feel like I have to force-feed myself bland, healthy food.


One of the first things I changed about her recipe was the tomato sauce. Her recipe calls for the tomato sauce which she has a recipe for in the book. I wanted to make this dish as simple as possible, so I just used crushed tomatoes and added some Italian seasoning, a pinch of salt here and there, and some crushed red pepper to add some flavor. These simple changes really elevated the flavor in this dish and I was more than pleased with the way this dish turned out. Which says a lot because..... I thought I hated mushrooms! Back to the Wegman's thing, their portobello mushrooms were just perfect. And the organic mushrooms were the same price as the regular, so that was a no-brainer decision.


PORTOBELLO MUSHROOM LASAGNA ROLLUPS
Adapted from: Ellie Krieger's The Food You Crave

10 lasagna noodles
2 tsp olive oil
2-3 portobello mushrooms (stems and gills removed), chopped
1 can crushed tomatoes with basil (use an extra can and season accordingly if you like extra sauce)
kosher salt
Italian seasoning
crushed red pepper
one 15 oz. container part-skim ricotta cheese
one 10 oz. package frozen, chopped spinach, thawed & squeezed dry
1 large egg
black pepper
parmesan cheese
1 cup grated mozzarella cheese


1. Preheat oven to 375 degrees.
2. Cook lasagna noodles according to package directions. Drain and lay flat on parchment paper.
3. Heat oil over medium-high heat. Add chopped mushrooms and cook, stirring occasionally, until moisture has evaporated. Add a pinch of salt, a touch of Italian seasoning, crushed red pepper to taste, and 1-2 ladles of crushed tomato straight out of the can. Simmer about 2 minutes. Remove from heat.
4. In a medium bowl, whisk egg and ricotta cheese together. Add a pinch of salt and black pepper to taste. Stir in spinach.
5. Spread 1 ladle of crushed tomato straight from the can in the bottom of a 9x13 baking dish.
6. Spread about 2 Tbsp of the ricotta mixture along the length of a lasagna noodle. Spoon about 2 Tbsp of the mushroom mixture on top of the ricotta mixture on the lasagna noodle. Roll the noodle and place in baking dish, seam side down. Repeat for remaining lasagna noodles.
7. With your remaining crushed tomatoes, add a pinch of salt, Italian seasoning and crushed red pepper to taste directly to the can. Stir until combined. Ladle the seasoned crushed tomatoes over your lasagna rollups.
8. Top with a sprinkle of parmesan cheese over each rollup. Top with grated mozzarella.
9. Top with foil and bake for 45 minutes. Remove foil and bake an additional 10 minutes or until the mozzarella is lightly browned.


I made this dinner after a long day of work on my feet and it was a cinch. I even did some of the dishes before I went to sit down! I was admittedly a little nervous about whether I would like this or not - mainly because of my fear of mushrooms, but alas, I was more than pleasantly surprised to find how much I (and the hubs!) liked this dish. And I'm even happier considering the vegetables that are incorporated into it. I need to eat more vegetables and this is a great way to do so. I hope you enjoy this one as much as we did!

Tuesday, June 15, 2010

Four Cheese Macaroni


Do I still have any readers out there? If so, hello! In any case, I just made up my own recipe! With inspiration from a few others. And it turned out pretty FAB. And it was still daylight when it was done cooking, so I was able to snap a few good pics of tonight's dinner to share with you :)


I had lunch with a few classmates (over the course of my "vacation" I completed the esthetics program at Jean Madeline, and well, I took an actual vacation, too!) to celebrate the end of our course. Living in Philadelphia is quite dandy for being a foodie. And Jean Madeline being in South Philly was quite dandy for trying the food at Bridget Foy's. There was one item on the menu a few of us were drawn to, that being the Mac and Cheese made with a four cheese bechamel with a potato chip crust. Sounded pretty amazing, until one of the waitresses said it wasn't her fave thing on the menu, so I changed my mind and ordered the burger (which was pretty freaking awesome). My friend, Maria, asked for an appetizer portion anyway and let us all try it. And after that I was kinda kicking myself in the ass for having doubted the mac and cheese.

Then I saw Stephanie blogged a mac and cheese with mascarpone and mozzarella and I was INSPIRED. I starred that recipe for reference later on and so today was finally the day to put my own spin on it. I was inspired by her use of mascarpone. I've only ever encountered it in tiramisu (one of my fave desserts of all time). Her recipe reminded me of the cheesy heaven I had at Bridget Foy's. So I started doing some research.


I saw Stephanie tweaked her recipe from a Cooking Light recipe which originally called for fontina. That was also intriguing. Then I read a review from somebody who didn't like the "stinky" smell of the fontina. Which then reminded me of how disappointed I was in a risotto once when I used parmagianno romano (to me, a "stinky" cheese). Then I read that gruyere was a good substitute for fontina, which I was familiar with after using it in a fondue once. So then I googled "four cheese mac and cheese" to try to find a good basis to start with. I found this one from Emeril and took a few bits and pieces from him as well. And here is the recipe I ended up, which was, AMAZING, and incredibly easy!


FOUR CHEESE MACARONI
Source: me, inspired by Stephanie, Cooking Light, Bridget Foy's & Emeril

1 pound pasta (I used Barilla Pipette because I thought the shape was fun)
4 Tbsp salted butter
4 Tbsp all-purpose flour
2 cups milk (I used 2% only because my store was out of 1/2 gallons of 1%)
3/4 tsp salt
1/4 tsp white pepper
5 good shakes of Tabasco sauce
1/3 cup grated parmesan cheese (yes, from the plastic jar)
4 oz gruyere cheese, grated
4 oz mascarpone cheese
8 oz extra sharp cheddar, grated
2-3 large handfuls of Lay's lightly salted potato chips, crushed (just eyeball it)
-----
1. Preheat oven to 350 degrees.
2. Cook pasta according to package directions. Meanwhile...
3. Melt butter in skillet over low heat. Whisk in flour and continue stirring over low heat for 3 minutes.
4. Gradually whisk milk into flour mixture, stirring continuously over medium heat for about 5 minutes, until thickened. Remove from heat.
5. Stir in salt, pepper, tabasco and the parmesan, gruyere and mascarpone cheeses until melted. Stir in a small handful of the sharp cheddar, reserving the rest.
6. Drain pasta. Return hot pasta to pot. Pour bechamel over hot pasta. Stir to coat.
7. Spray a 9x13 dish with nonstick cooking spray.
8. Layer 1/3 of cheesy pasta into bottom of dish. Layer 1/2 of the remaining sharp cheddar. Layer the second 1/3 of cheesy pasta. Top with remaining sharp cheddar. Top with crushed potato chips.
9. Bake for 40-45 minutes or until bubbly and golden.


This really was one of the greatest dishes I've ever made. I'm pretty proud of it. I have a track record of screwing up my mother-in-law's macaroni and cheese recipe so I'm beyond thrilled to have come up with my own mac and cheese recipe that I'll continue to make through the years and hopefully pass on to my potential children and their potential families.

One change I will TRY next time is to stir in ALL of the cheeses, including the sharp cheese, so that the bechamel has that melty, stringy texture, assemble the dish, and broil it for a few minutes for the top to get golden. The only thing I noticed was that the melty, stringiness went away after the bechamel was baked into the pasta. So I think I'll try it this way next time and decide which method I like better then.

Friday, January 8, 2010

Ricotta Blueberry Pancakes


I'm a foodie. I watch the Food Network regularly. One of my newest favorite shows is The Best Thing I Ever Ate. There's just something so justifying about a Food Network chef declaring something as the best thing they ever ate. It's like, if you were to go eat the same thing, there's no way in the world you would be disappointed by it.

I happened to catch the breakfast episode where Aida Mollenkamp pronounced her love of some ricotta blueberry pancakes from BLD restaurant in Los Angeles. And just the week before my best friend mentioned that her husband was making her some ricotta pancakes. I was captivated.


I scoured the internet for a recipe that seemed like it was closest to BLD's as portrayed on the show and I chose this one. I was not disappointed in the least! And I've made some pretty $h!tty pancakes over the years! I'm pretty sure that whenever I'm going to make homemade pancakes again, I'm going to be choosing this recipe. They were light and fluffy (which is usually where I fail), and melt in your mouth. Basically, perfect. And considering I nailed these guys on the first try - how could I not revert to this recipe from now on??

So if you're looking for a simple yet decadent morning treat, why not try one of the best things you could ever eat?!


Since I made this recipe exactly as I found it, please click here for the recipe!

My only note will be that for my first pancake I must not have had the griddle hot enough. I had great results over medium heat, as you can see! I was able to cook 4 pancakes at once on my square griddle pan.

Ps. This recipe makes a ton of batter. If you're only cooking for 2, I recommend cutting the recipe in half.

Sunday, October 5, 2008

Tortilla and Black Bean Pie


I've had this recipe saved for a few months. I originally saw it on Liz's blog, and again on Melissa's blog with a few modifications. Finally I fit it into our weekly menu. Boy am I glad!! This was so good and really simple to make. The most trouble I had was opening the cans of beans with my manual can opener! Don't worry, a new can opener is on my list of must-gets in the near future :) This was really yummy in it's original version, but I can already get a sense of how it would taste with Melissa's modifications - I imagine something akin to Taco Bell's Mexican Pizza, which I love. Also, I think I might try this some time by adding in some hard taco shells to add some crunch to it. I think this is a great recipe that can be modified here and there to give you a great result, however you might change it.

So if you love Mexican (like me and the hubs do), you MUST try this one!

TORTILLA AND BLACK BEAN PIE

4 (10-inch) flour tortillas (I happened to buy 8 inch tortillas which fit perfectly into my springform pan)
1 Tbsp canola oil
1 large onion, diced
1 jalapeno, diced (I used about 1 Tbsp jarred, diced jalepeno)
2 cloves garlic, minced
1/2 tsp cumin
coarse salt and ground pepper
2 cans black beans, drained and rinsed
12 oz. beer (or 1 1/2 cups water) (USE THE BEER!)
1 package (10 oz.) frozen corn
4 scallions, plus more for garnish (I didn't add mine into the pie because I prefer them fresh, crisp and cold)
2 1/2 cups shredded cheese (I used a block of colby-jack)

-----

1. Pre-heat oven to 400 degrees. Using a paring knife, trim tortillas to fit a 9-inch springform pan, using the bottom as a guide. Set aside.

2. Heat oil in skillet over medium heat. Add onion, jalapeno, garlic and cumin and saute until softened, 5-7 minutes.

3. Add beans and beer to skillet; bring to a boil. Reduce heat to medium; simmer until liquid has almost evaporated, 8-10 minutes. Stir in corn and scallions, and remove from heat. Season with salt and pepper.

4. Fit a trimmed tortilla in bottom of springform pan. Layer with 1/4 of the beans (I did 1/3) and 1/2 cup cheese. Repeat 3 times, ending with 1 cup of cheese on top.

5. Bake until hot and cheese is melted, about 20-25 minutes (mine was slightly browned at 20 minutes). Unmold pie, sprinkle with scallions. To serve, cut into wedges (serves 5-6).

Tuesday, September 16, 2008

Broccoli, Cheese & Rice Casserole


Sigh. I'm trying to eat more vegetables. I've never found vegetables to be exciting. I scoured myrecipes.com to find some appealing recipes and came across this one. It had decent reviews. In the end, I didn't love it, but it was good. I made it tonight as a meal but think it would be more acceptable as a side dish, possibly for a fall dinner party or something. But I don't have dinner parties so I dont think I'll be breaking this recipe out again in the near future. Also, at first, the onion seemed to be a little overwhelming, but I quickly forgot about that. The creaminess lended by the cream of mushroom soup and the cheese was comforting. I think this would be a great recipe to get kids to eat more veggies. But I don't have kids, so I'm just going to keep this recipe in the bottom of my recipe drawer.

BROCCOLI, CHEESE & RICE CASSEROLE
(come to think of it - I bet this recipe would've been a real winner in 1999)

1 cup uncooked instant white rice
1/2 cup chopped onion (I'd consider reducing this to 1/4 cup and chopping smaller than I did)
1/4 cup fat-free milk (I used 1/3 cup of milk based on reviews, and also used 1% milk)
4 ounces light processed cheese, cubed (I used 1/2 regular velveeta and 1/2 low-fat sharp cheddar)
2 (10 oz.) packages of chopped broccoli
1 (10 3/4 oz.) can of reduced sodium condensed cream of mushroom soup
-----
1. Preheat oven to 350 degrees.
2. Spray a 2 quart casserole dish with cooking spray.
3. Mix all ingredients and spoon into casserole dish.
4. Bake for 45 minutes.

Wednesday, July 30, 2008

Tilapia with Lemon Spaghetti


Like it or not, I'm a fan of Rachael Ray. I don't like everything she cooks, but I love her 30-minute meal concept. So occasionally after work I can catch her show on the food network. One day I happened to catch the Sea Note episode and when I saw her making this lemon spaghetti, I knew I had to try it. Along with the lemon spaghetti, she made flounder francese with toasted almonds, lemon and capers. My husband doesn't like flounder, and I don't think either of us are fond of capers - so I decided to try it with tilapia, seasoned with salt and pepper with a simple dip in egg then lightly fried in EVOO. The result - a seriously satisfying and somewhat healthy dish. I use light cream and high fiber pasta (Smart Taste). It's a way to get healthy fish into my somewhat picky husband.

LEMON SPAGHETTI
Source: Rachael Ray

Salt
1 pound spaghetti
3 tablespoons extra-virgin olive oil (easily reduced)
4 cloves garlic, finely chopped
1/2 teaspoon crushed red pepper flakes
2 lemons, zested and juiced
1/2 to 3/4 cup heavy cream (I use light cream with excellent results)
1 cup grated Parmigiano Reggiano
Handful flat-leaf parsley, finely chopped (omitted)
1/2 cup (10 or 12 leaves) fresh basil, very thinly sliced (omitted)
-----

1. Bring a large pot of water to a boil. Salt the water and drop the spaghetti into the pot.

2. Heat a large deep skillet over low heat. Add extra-virgin olive oil and garlic and crushed red pepper flakes.

3. When the pasta has been cooking about 5 minutes, add lemon juice, a ladle of the cooking water from the pasta and the cream to the garlic and oil. Raise heat a bit to bring sauce to a bubble.

4. Drain pasta when it still has a good bite to it, al dente. Add lemon zest and half of the cheese to the cream sauce. Season the sauce with salt, to taste. Add pasta to pan and turn off heat. Toss the pasta with sauce a minute or 2, allowing it time to soak up the sauce.

5. Top the plates of pasta or platter with remaining cheese, parsley and basil.

Thursday, July 3, 2008

No, really, it was perfect!


I'm an avid reader of The Pioneer Woman Cooks! Not only does she never cease to crack me up with her commentary, but her food always looks mouth watering. One day I came across her Perfect Risotto recipe. I thought nothing of it then because I thought risotto would be one of those things I would never even attempt to make. That is, until Lindsey made her lemon risotto with shrimp and peas a few weeks ago and I gave it a try. When I didnt have such great success with that recipe because I didn't like the pecorino romano cheese, I thought back to Pioneer Woman's Perfect Risotto. I rushed to her website/blog and feverishly copied down the ingredients and directions and set out to make up a half batch to have with some steaks my husband and I recently got from Omaha Steaks.

I set out to make this risotto with only parmesan cheese. When I was prepping everything, I decided to grate some of that pecorino romano I still have leftover from my last risotto attempt. In the end, this risotto turned out amazing, and was, in fact, perfect. :)

PIONEER WOMAN'S PERFECT RISOTTO

Here are the measurements scaled down for about 3 servings:

1/2 Tbsp EVOO
1/2 Tbsp butter (I only had unsalted in the fridge)
1/4 cup finely diced onion
1 clove garlic, chopped
1/2 lb Arborio rice
32 oz. carton of reduced sodium chicken broth
1/4-1/2 cup light cream
1 cup grated cheese (your choice of parmesan, romano and/or asiago)
salt & pepper to taste
chopped chives

-----

1. Heat oil and butter in skillet over medium-low heat. Add onion and garlic and saute until soft and translucent.

2. Add arborio rice to pan and stir. Add about 1/2 cup chicken broth and stir. Reduce heat to low. When broth is absorbed, add another 1/2 cup (I just used a ladle) and stir until absorbed, repeating process until rice is to desired tenderness.

3. Remove pan from heat and stir in the cheese.

4. Add a few splashes of cream and stir.

5. Stir in chopped chives, season with salt and pepper and serve hot.

6. Proceed to make the chocolate chip cookie bars blogged above!

Tuesday, July 1, 2008

Crustless Ham, Cheese and Spinach Quiche


I subscribe to Cooking Light magazine. Usually I have trouble finding something that interests me because I have such simple tastes. But this month page 160 just jumped out at me, so before I recycled my magazine, I tore this page out and set it aside. This golden nugget is for a Crustless Smoked Turkey and Spinach Quiche - of course, I had to adapt this recipe because I've never before seen smoked turkey ham as the recipe calls for, and the swiss cheese I had in my house seemed to have gone past its expiration date.

But after coming up with a mix of cheeses that I did have in the fridge - 4 cheese mexican blend, american cheese, and keeping with the reduced fat cheddar - this turned out FANTASTIC. I was so happy with the results as it was my first quiche ever. So if I'm ever craving a quiche again, this will definitely be my go-to recipe!

Crustless Ham, Cheese and Spinach Quiche

3/4 cup cubed ham
1/2 cup chopped onion
1/8 tsp freshly ground black pepper
2 large eggs
2 large egg whites
3/4 cup shredded mexican cheese blend, separated in 1/4 cup and 1/2 cup
1/4 cup reduced fat cheddar cheese
1 slice of american cheese chopped up
3/4 cup fat-free cottage cheese
1/2 cup evaporated fat-free milk
1/2 cup all-purpose flour
1 tsp baking powder
1 cup baby spinach leaves

-----

1. Preheat oven to 350 degrees.
2. Heat a large non-stick skillet over medium-high heat. Coat pan with cooking spray. Add ham, onion and pepper to pan and saute 4 minutes until ham is lightly browned.
3. Spray a 9-inch pie plate with cooking spray. Sprinkle 1/4 cup mexican blend cheese in pie plate. Top with ham mixture.
4. In a large mixing bowl, gently whisk together the eggs, remaining cheeses, cottage cheese, and evaporated milk.
5. In a small bowl, stir together the flour and baking powder. Add flour to egg mixture and gently stir in.
6. Add spinach to egg mixture and gently mix in.
7. Pour the egg mixture over ham mixture in pie plate.
8. Bake for about 45 minutes until a knife inserted in center comes out clean.

Tuesday, June 24, 2008

Revisiting a childhood favorite...


As a kid, my mom would occasionally make crescent-wrapped cheese dogs. My sisters and I loved them. Even my husband loves them. After talking to my friend Jess one day about what to do about a bunch of hot sausage she had to cook up, we sort of devised this idea. It's beyond simple, and as always, versatile.

Ingredients:
2 links of hot sausage, butterflied (optional: remove skins)
a few slices of mozzarella cheese
1 can reduced-fat crescent rolls
parmesan cheese

1. Pre-heat oven to 375 degrees.
2. In a skillet, brown the butterflied sausage links over medium heat.
3. After the sausage is done, roll out the crescent roll dough and create 2 squares by pressing or rolling the triangles together.
4. Lay mozzarella on one half of each crescent square. Top with sausage link and close by pressing edges together.
5. Place on parchment lined baking sheet.
6. Sprinkle a bit of parmesan cheese on top and bake 12-15 minutes or until golden brown.

So for those cooks who are looking for something quick, simple and delicious for dinner, give this one a try!

Sunday, June 22, 2008

My first risotto...


My friend Lindsey has been making a lot of risottos lately. And of course, being an avid watcher of Hell's Kitchen, I've noticed risotto is a sort of popular dish these days. Who knows if it was popular before Hell's Kitchen - cuz honestly, I've never even heard of it before I started watching the show.

Anyway, Lindsey posted an awesome looking Lemon Risotto with Shrimp and Peas. As soon as I saw it I knew it had to be my first try with risotto. So, I set out to find that special rice in my grocery store. Of course my lame grocery store didn't have it, but I found it at the second store I went to. I came right home and started cooking this dish up.


My personal thought on this dish is that I really loved it before I added the pecorino romano cheese. I think I'm a weirdo who doesn't like cheeses that smell like feet or something. So while I was sort of put off by the final product because of the cheese, I'm definitely going to be trying other variations of risotto in the future.

I don't know if the texture of my risotto was right either as I don't have anything to compare it to. But I'll have to make it a point to try it out - either at Lindsey's place (wink, wink), or out at a restaurant.

Monday, June 16, 2008

Chicken Calzones


On the quest to cook dinner more often, I needed to come up with some new ideas for dinner. Nobody likes the same old dinners week in and week out. We love to order calzones from our local pizza place, so why couldn't I give it a shot? Well, I'd tried it once a ball of dough and failed, miserably. So now it was time to revert back to "convenience" foods. In comes the Pillsbury pizza dough found in the refrigerator section of your supermarket. This was SO EASY! No rolling of dough required. Those close to me know that I suck at rolling out doughs and have grown to fear doughs now. So if you have a fear of rolling out pizza dough, this was a great alternative and I would encourage you to give a shot for your own baked-at-home pizzas/calzones/strombolis.


1 refrigerated Pillsbury pizza dough crust
1/2 small block of part-skim mozzarella, sliced
1/2-1 cup part-skim ricotta
2 grilled chicken breasts, sliced
parmesan cheese

-----

1. Open up the pizza dough flat and cut in half into 2 rectangles.

2. Lay mozzarella cheese on half of each half.

3. place 1 cut up chicken breast on top of mozzarella.

4. Spread a few tablespoons of ricotta over chicken.

5. Fold dough over toppings and seal edges.

6. Lightly spray the tops with EVOO and sprinkle with parmesan cheese.

7. Place on parchment lined baking sheet and bake in a preheated 400 degree oven for 12-15 minutes.

The versatility of these calzones is endless - put your favorite toppings in for a simple, quick and delicious dinner!


Thursday, June 12, 2008

Parmesan Pork Chops w/ Creamed Spinach


Hello! Long time no blog! It's been a whole month since my last blog post. I honestly hardly cooked at all in that time! Have you ever gotten into a total food rut? Well that's what happened to me. But I was finally able to pull myself out of it, so hopefully my blog posts will be more frequent now.

The dish to pull me out of this most recent food rut was Giada's Parmesan Crusted Pork Chops. I've only heard rave reviews over this dish, one from my friend Lindsey over at Noodle Nights and Muffin Mornings, and it did not disappoint! Seriously, when I took the leftovers into work today and heated them in the microwave - 2 people asked, "What smells so good?!" Followed by, "I'm just gonna go get my plate," and "so you'll come by my house tonight to cook dinner, right?" I think that's one of the bests compliments you can get on your cooking.

PARMESAN-CRUSTED PORK CHOPS
Source:
Food Network

For ingredients and directions, visit the source link as I followed it exactly.

~ ~ ~ ~ ~ ~ ~ ~ ~ ~ ~ ~ ~ ~ ~ ~ ~ ~ ~ ~ ~ ~ ~ ~ ~ ~

Now, when I was thinking of a side I knew I wanted some simple buttered noodles. I really like Ronzoni's Healthy Harvest extra wide noodles with a touch of Smart Balance and parsley. But I needed a vegetable. I thought of some creamed spinach that I recently had from a local bbq joint. I'm usually not a fan of cooked spinach, but it was so good! So I found a lightened up version from Cooking Light and gave it a test drive. I found that it was relatively simple and easily halved, however I would drastically reduce the amount of shallot. Here's the halved recipe (serves 1-2) with my recommended changes noted.

CREAMED SPINACH
Source:
Cooking Light

1 10 oz. bag of spinach
cooking spray
1 Tbsp minced shallot (I would only use 1 tsp)
1 tsp all-purpose flour
pinch of salt
pinch of nutmeg (excluded)
1/4 fat-free milk
1/4 reduced fat cream cheese

-----

Remove large stems from spinach, and rinse with cold water; drain. Place a large Dutch oven over medium heat, and add spinach. (Spinach will need to be tightly packed into the pan to cook all of it in one batch). Cover and cook 5 minutes or until spinach wilts; stir spinach well after 2 minutes. Place spinach in a colander, and drain well, pressing spinach with the back of a spoon to remove as much moisture as possible.
Place pan coated with cooking spray over medium heat until hot. Add shallots; sauté 2 minutes. Combine flour, salt, and nutmeg; add to pan, stirring well. Cook 30 seconds. Add milk and cheese, stirring with a whisk; cook 1 minute or until thick. Add spinach; cook 30 seconds or until thoroughly heated.